Showing posts with label easy. Show all posts
Showing posts with label easy. Show all posts
Wednesday, January 7, 2015
A Bipolar Mom and Her Daily Life! : Christmas Eve Box
A Bipolar Mom and Her Daily Life! : Christmas Eve Box: I know this is late but I still wanted to share this Christmas Eve Tradition! I have seen this idea floating now for several years now on ...
Sunday, October 26, 2014
Weekend Wrap Up To Include PUMPKIN POOP AND WITCHES NAILS
I hope your weekend has been a great one!
After it got dark out side! We turned on the Halloween lights and broke open a glow stick to see are Jack-O-Lantern glow!!!! Caleb had the honor of putting the glow stick in the pumpkin and he thought that was the neatest thing ever!
Our weekend was full of pumpkin carving, pumpkin painting, and a fun movie themed snack!
One of my personal favorite holidays is Halloween with the pumpkin patches, movies, decorating, and all sorts of fun activities However, this year with hubs recovering from knee surgery there is not a lot he can do in terms of walking and the more stressful events on the body. We stress family time as a whole so this would include him and with our kids being so young and him being here I would feel horrible going to a pumpkin patch or a fall festival without him. As a military family there are often times we have to do so many things without because he is gone to include huge milestones so when he is here even if he recovering from knee surgery it is family time and we will find a way to enjoy it!
So I went to the grocery store and bought a very nice pumpkin and two little ones so we could still carve and paint the pumpkins. Christopher loves to carve pumpkins and for him to pick out a design for a jack-o-lantern is very much like a woman picking out a pair shoes for an outfit! However, once the design was decided upon it was time to get messy!!!
 |
| Property of Bipolar Mom and Her Daily Life: Daddy Cutting The Top Off Of The Pumpkin |
Have you ever noticed with little ones? When you encourage your little ones to get messy they are slightly hesitant but if they find the mess themselves they are all for it?
 |
| Property of Bipolar Mom and Her Daily Life: Caleb not sure about the seeds |
They were not sure of the pumpkin guts but they most mess with it! Which made this mommy very happy!
 |
| Property of Bipolar Mom and Her Daily Life: Caydance was the first to go all in! |
 |
| Property of Bipolar Mom and Her Daily Life: Well if Caydance can do it I can do it! |
When it came time for the cutting of the jack-o-lantern mommy brought out their little pumpkins to paint! Which I must admit was a hoot ! Caleb had a blast painting his pumpkin while Caydance enjoyed painting herself!
 |
| Property of Bipolar Mom and Her Daily Life: Picture of the Painting Pumpkins aka Messy Messy! |
After they had showers we snuggled down for a movie... for the life of me I cannot remember the title. I decided instead of popcorn which is the often go to snack in this household for movie night that I would do a Halloween themed treat! Now I know this is not super healthy and only a sometimes treat but we had PUMPKIN POOP and WITCHES NAILS!!! or in others word bugles and cheese balls! The pumpkin poop was the kids favorite! I tried to show Caleb how to wear the bugles on his fingers but he was not having it.
~I found the Pumpkin Poop and Witches Nail Idea on Pinterest~
 |
| Property of Bipolar Mom and Her Daily Life: Pumpkin Poop and Witches Nails can be found on Pinterest |
 |
| Property of Bipolar Mom and Her Daily Life: Not our best work for Halloween decorating with one man down. I hate that half of my tree is out. Christopher promised to figure out what happen to it. |
So that is what happen in the household of Bipolar Mom and Her Daily Life House Hold!
Have a great Halloween! Stay Safe!!! See You next Week!!!
Thursday, July 24, 2014
DIY: Bachelorette Favor Bags!

Here is how I made the favors for the Bachelorette Party!
The first thing you will need is to decide is the "basket" that will hold all the goodies. This does not have to be a basket it can be a bowel, cup, jar, bucket, wine glasses, and so on. Be creative almost anything can be used as a basket! I found these bowls at the Dollar Tree they are 4 for $1. I also decided to use the favor bags to help hold the goodies in because I had to haul these favors down to Florida. Now I keep tons of these on hand for bow packing but I also get these at the Dollar Tree in Party Section. They even sell them in them in clear but I liked these for the theme I was going for and had them on hand! You can also buy them at craft stores and party stores but they are more expensive and I cannot tell the difference so if you want more bang for your buck pick them up at the Dollar Tree.
 |
| Property of A Bipolar Mom and Her Daily Life |
The second thing you will need to do is decide is what to put into the "baskets"! Now this is where most of your budget will go. You will also need to decide what type of baskets you are making and what I mean by that is how "adult" themed you are going to make them. If you look up ideas or even look for bachelorette party items you basically can see what I mean by "adult" theme. I decided on my items based on who would likely be coming to the party and did not want to have to tailor the favors to guest. I knew because the first part of the bachelorette party there were going to be two teenagers from the bridal party, the mother of the bride, and none of us were huge drinkers that I did not want to make a wine/bar themed gift basket. So I decided to go on a pink and spa like basket!!!
 |
| Property of Bipolar Mom and Her Daily Life |
I was actually to get all of these items at Dollar Tree Store and the dollar sections of stores. Some of the items came in multiples in a package such as nail file, Tylenol, gum, tissue, and hand sanitizer. I do suggest when you are buying goodies for your favors that you buy all at one time to make sure you have enough for the favors. No I do not mean you have buy ALL the goodies for the favors at once if you are on a budget or looking for a specific item. What I mean by that is when you find one item for the basket is buy enough for the entire amount of favors you are making so you are not scrambling to find matching or similar items. I found by making sure that I have all the same items for favors that you stay on budget.
The next thing you want to do is decide how you want to place things in the basket, if any items need to come out of its package, and if your basket needs filler. I did not take any pictures (sorry) for this part but I did add filler and took the nail polish out it package.
I placed the bowl inside the favor bag first. I found this made it easier to place and position the goodies.
I then added filler to bowl. I bought two packages of pretty but pain my butt plastic shinny shreds. You can find them at Dollar Tree where I bought mine or you can purchase it party stores or craft stores. They all kinds of filler and if you decide to use one just find the one that will make your basket pop!
Next add the items to your basket any which way you feel!
If you used a favor bag or something that is holding everything together make sure it closed. I just simply twisted the favor bag and used the twist ties that came with favor bags. You know the dreaded bread ties! I then added curling ribbon as finishing touch!
 |
| Property of Bipolar Mom and Her Daily Life |
A view of all the Gift Bags... Sorry on the Book Shelf again (you may actually notice this a lot)... They were going to Florida so there is no fancy table display and it keeps it away from little hands!
 |
| Property of Bipolar Mom and Her Daily Life |
 |
| Property of Bipolar Mom and Her Daily Life |
HAVE FUN WITH IT!!!
Wednesday, June 11, 2014
A Bipolar Mom and Her Daily Life! : 52 Week Savings Challenge : Frugal Change or shoul...
A Bipolar Mom and Her Daily Life! : 52 Week Savings Challenge : Frugal Change or shoul...: There are many aspects of the frugal lifestyle. As I have researched the many areas of being frugal the one area of being frugal is the abil...
52 Week Savings Challenge : Frugal Change or should I say ching ching?
There are many aspects of the frugal lifestyle. As I have researched the many areas of being frugal the one area of being frugal is the ability to start saving money. Now there are many topics about saving and which is the best way to go about it to pay down your debt and save at the same time and frankly for me it is overwhelming with all the information and which is sad I am a person who likes to research. All I can is say about this point I highly doubt I will blog about this exact subject and which way we decided exactly to go. However, but that will be for a different time and blog post if that does happen. There are also many articles out there about easy ways to save and how to cut cost to put some extra money in your pocket. So I figured that is prefect area for someone who is exploring the frugal lifestyle to start when it comes to savings and to really get started about serious about saving money.
Now with most of these frugal post I am going to put a little bit of testimony/truth/confession in here on why we are doing this. I feel like expressing these on here it helps relieves the stress but being honest where you at in your life makes you face reality and you can move forward. I also know if I can be honest openly I know maybe there is someone out there that I may reach and say "hey I am not alone","Wow they are really being honest about their life situations and they are taking it a step at a time" or "they are just telling me how to do it they are living it and really doing it step by step". When I ready for a change or want to make a change in my life I usually get all excited about it and bite off more than I can chew whether it is weight, taking a new approach to my bipolar disorder, organization, a new plan with the kids, and so on. I read stories, research, start with too much, and so on. I become overwhelmed, become very intimidated by all the success stories, and even a little jealous who I view has their life really put together (whether it is actually or not because I do not know what is going on behind close doors). However, it took me a long long time to realize with any change it really does take small steps and nothing will really happen overnight. Even though if you have this huge goal or change in mind if you take small steps, small goals, small changes to reach it... you will have amazing results. So at the end of this blog post I want to thank a couple of people who really inspired me. So moving on from this sidebar and on to the truth part of this post.
TRUTH: My husband and I are horrible at savings whether we like to admit or not. Now we have multiple savings accounts and besides the one I keep for small craft business Gifts By Vaughn (https://www.facebook.com/GiftsByVaughn?ref=hl) they are pretty sad. Now why cannot we save? Well the first answer is we can't but that really is a lie because we have an allotment going to one and if we were able to leave it alone than we would be "saving". Well the first honest reason is the main one that usually goes hand in hand with checking (like most people have with banking) we just do not add money to the savings account plain and simple. If we do start putting money in there it will eventually make it way back over to checking whether we moved it or the bank moved it because we were short in our checking account and then we lose a $1 for them moving our money for us. So we open an additional account outside to a different bank and set up an allotment to that account to start building our savings up. Well sadly every time we thinking we are getting ahead something comes up and we have had to take from that savings and when you take take from savings and only put the bare minimum in you have no growth in savings and a whopping no balance and the constant fear if something happens what are you going to do next? So what does this really mean? My husband and I really need to reprogram ourselves on how to save money and save it well. So that is why we decided on the 52 Week Savings Challenge as one way to approach to saving and the main reason for this post!!!
52 WEEK SAVINGS CHALLENGE
If you simply Google 52 Week Savings Challenge you find your answer and tons of charts on what type of challenge this is. However, the basic concept of this challenge each week of the year you will deposit a certain amount of money into a account or place of your choice. It is recommended that your weekly deposit follow the week that you are on. So for week one you will deposit $1, week two $2, week three $3, and week fifty two $52. If you follow these amounts by the end of the year you will have saved $1,378. You can find more information about the basic concept of the 52 week savings challenge here http://www.52weekmoneychallenge.net/welcome-to-the-52-week-money-challenge/ .
How we are doing it. Now we decided to take this challenge but decided to leave the money outside the bank and a place to see the money to watch it grow. So if you are going to leave the money outside of the bank you will need a 52 week savings challenge chart you can simply Google it or look it up on Pinterest there are tons out there that range from fancy, simple, and even are modified a little for people who have adjusted the challenge to meet their need. I posted below a simple example of the 52 Week Savings Challenge Chart for you but I will also show you what and how we are doing.
Like I stated above you just have to search and you will find tons of these charts! Now onto the way Christopher and I are doing it and I will throw a little psychology into it. Hey I have a Bachelors in psychology and working on Masters might as well use it! Well my chart is nothing fancy in fact I jotted it out on an index card... I know fancy right?
How we are doing it. Now we decided to take this challenge but decided to leave the money outside the bank and a place to see the money to watch it grow. So if you are going to leave the money outside of the bank you will need a 52 week savings challenge chart you can simply Google it or look it up on Pinterest there are tons out there that range from fancy, simple, and even are modified a little for people who have adjusted the challenge to meet their need. I posted below a simple example of the 52 Week Savings Challenge Chart for you but I will also show you what and how we are doing.
 |
| Source: amittenfullofsavings.com via Google images |
 |
| source: image belongs to Bipolar Mom and Her Daily Life! http://pcos4lifejourney.blogspot.com/ |
Well I decided to write it out one it was quicker to jot it down and because we are "both" doing the challenge I can write down the actual amount of each weeks deposit. So for us week one is $2, week two is $4, and week fifty two is $104. We also let room if were able to save a little extra. We actually just deposited week 2 and we actually put in an extra $1.77 so as long as the base deposit is met each week by 52 weeks we will have saved $2756! Do not fear the bigger deposits towards the end of challenge because by the end mark it should be easier to save which is the goal of this challenge!! Also if you are living frugal it should start having extra money to save making this challenge easier as is progresses through the year. You also need to decide when you are going to deposit your money each week since it is not going into a bank account. For hubs and I we decided on Sunday and since we may be adding more than the base deposit we store the deposit on the side until it ready to go into the jar so it can be counted.
 |
| source: image belongs to Bipolar Mom and Her Daily Life! http://pcos4lifejourney.blogspot.com/ |
Since the money is being stored in our bedroom we have these plastic leave dishes that went with our bedroom decor (we are country/woodsy) that I bought at the Dollar Tree a couple years back that ended up not being used and were collecting dust on top of jewelry box. So this where we sit that weeks deposit until the wend of the week until Sunday and count it put in the mason jar! The cat is just my crocheted kitty that protects the money...hehe! Our challenge sits on my bookshelf on the top shelf with Dean Koontz you cannot get any better than that in our bedroom!!!
Now if you remember earlier in this post I stated that my husband and I needed to basically reprogram ourselves on how we think about saving. That is why decided to keep the money outside of the bank and bare with me this where the psychology comes into this and why this is a good challenge for someone who needs to reprogram in the way they think about saving and how to positively reinforce that behavior by positive motivation. Motivation is simply defined as the process that initiates, guides, directs, and maintains goal-orientated behavior. It is literally the desire in which we decide to do something whether to actually make a change or just sitting around thinking about making a change. In psychology terms motivation involves biological, emotional, social, and cognitive forces to activate one's behavior. Now there are a number of theories on motivation and fancy terms that are used when psychologist discuss/debate about what motivation really is but that really is not the point. So lets stay focus on positive motivation and why me and hubs are using are using at as a tool to positively reinforce our behavior on saving. By seeing are money actually grow through the year we have a tangible results on hand to see that it is working and growing. You can also look at as extrinsic motivation or outside positive motivation at work at this challenge and at the end of this challenge we can take that tangible "result" and do something with it whether it is vacation, investment, savings, and so on. Now there is also intrinsic motivation or internal positive motivation at work as well in this challenge and what I view as the most important of these challenge. By completing this challenge not only will you have personal gratification that you completed your goal but you are helping yourself reprogram your brain on how to save and setting yourself up for positive results, success, and a long term future. Well that is what we want to do! Well that is my psychology degree at work now only if my grammar was better and my student loans would just up and vanish...hey I can dream/wish?
 |
| source: image belongs to Bipolar Mom and Her Daily Life! http://pcos4lifejourney.blogspot.com/ |
Sorry I had no idea this was going to be as long post
Personal Thanks: There are a couple of people I wanted to thank who have motivated me though my life. These thanks are not all directed at 52 week savings challenge but just in general about motivation and change.
I first want to thank my parents. They have been one of my biggest supports in my life through so much through my heath issues, life struggles, ups, downs, good times, bad times, and so on. They are who keep me motivated besides my husband! I am not sure what I would do without them.
Shannon- I first met Shannon when we first moved to Camp Lejeune. You talk about a woman jack of all trades. She has been one of the most motivating people I have ever met!! She actually reminds me of a much younger version of my mother and which is amazing because my Mom is one of best friends. Now I can go into details of all things on why I am very motivated but all I will say she is an amazing military wife and mother and now it is her time to shine! So I am going to give her a shout out. If you live in North Carolina check out https://www.facebook.com/shannon.sines.9 the Owner Formal Creations she does amazing work! I just want to thank Shannon from the time that I known you from your jokes that people often do not get, to some great conversations, being a role model whether you realized it or not, and reaching for dreams you truly are a motivating person to me.
Lisa- she is also another positively motivating person I have ever met and the sweetest. She has helped me embrace my physical life changes as well as the emotional ones that come with trying to make a healthier lifestyle. Just with type of change it can be overwhelming and she is right there with you helping you. She runs a group Lisa Kingslayer Fit Future https://www.facebook.com/FitFuture1 and I promise she is not in your face about her group but actually cares about the ups and downs of obtaining a healthier lifestyle. She is a real person not a supermodel and embraces herself flaws in all and which makes herself that more motivating! I want to thank her so much for the impact that she has made on my life.
Ashley- I have known you through a couple of deployments now and I think you are an amazing and motivating person, wife, and mother. I know there are tons of wife and mothers out there in our shoes but you have always to me seem so motivated and positive in the things you do through the life of being a military wife. Which is extremely motivating and encouraging to move forward with all my goals in life especially as a mother and I thank you for that.
There are a couple of wives that I just need to thank: Jodie, Megan S, Dara, Dawn, Carri, Sarah C, Shelly F, and Rebecca D.
Saturday, May 31, 2014
A Bipolar Mom and Her Daily Life! : Asparagus To Die For... Super Easy..Tested and Tri...
A Bipolar Mom and Her Daily Life! : Asparagus To Die For... Super Easy..Tested and Tri...: Okay there has been this recipe that I have seen floating on Facebook and Pinterest in many variations. It is oven roasted asparagus and the...
Asparagus To Die For... Super Easy..Tested and Tried !!!
Okay there has been this recipe that I have seen floating on Facebook and Pinterest in many variations. It is oven roasted asparagus and the people that post about this or have re-pinned it claim it to be the best whether they have actually tried it or not. Well I have tried one of these recipes floating around and I am hooked. So here is my take on these amazing oven roasted asparagus!


Then I popped it in the oven for 8 to 10 minutes on 350. Most recipes I have seen say 400 for 8 minutes but I know how my oven is so that is why I choose 350 and it came out wonderful! I can see why entire households who like entire asparagus go nuts for these type recipe. Well here is my final result!
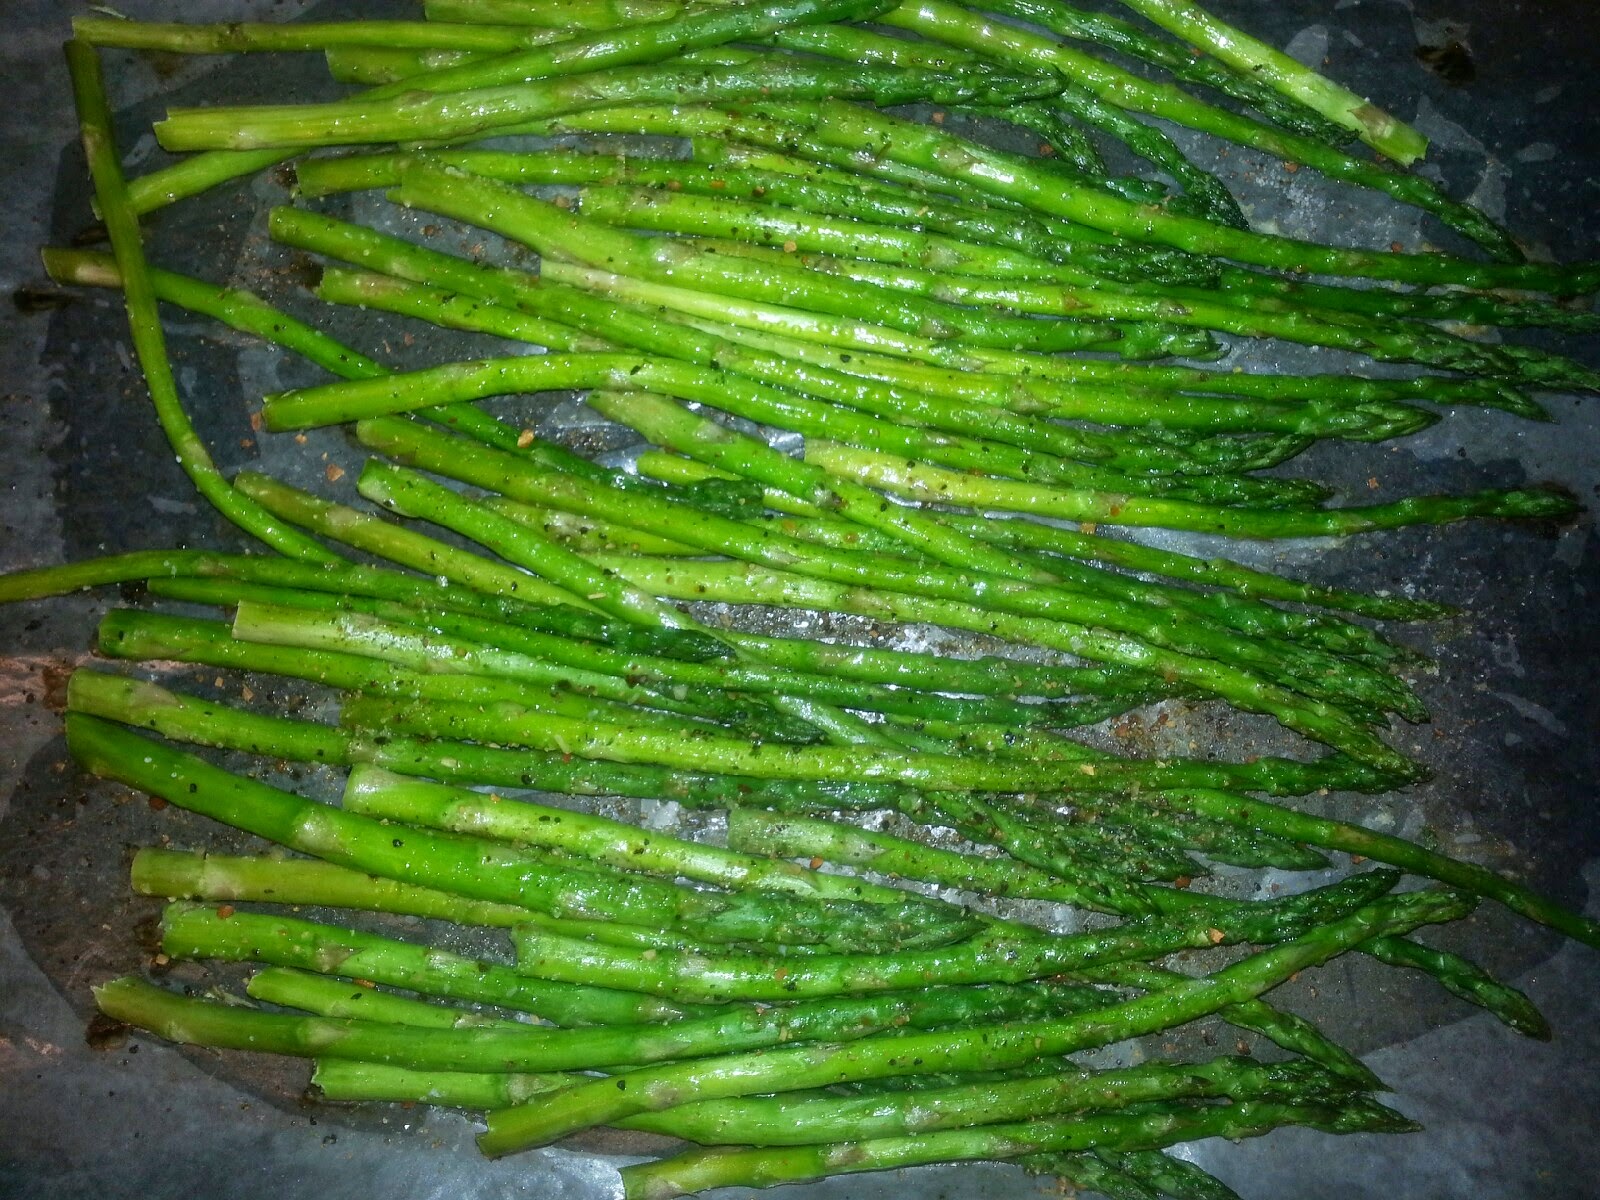
I could not help to sneak a piece before dinner and I was taken a back! Not only did I find it easier than steaming asparagus I found that it taste a lot better. Now I am the only in my household that really eats asparagus. My son is really discovering this vegetable and my husband prefers never to touch it but I made him try it and he liked it. He actually ate a few pieces for dinner and that is saying something for someone who does not touch asparagus. What I also love about this recipe is you can season it how you want! If you want spice add a little spice. I have also seen these recipes where people shake Parmesan cheese on them. I really do believe the choices are endless on this side dish and can be tailored to personal choice.
Well enjoy this simple, yummy, side dish!!!
What You Will Need
Asparagus
Extra Virgin Olive Oil
Salt (I used sea salt)
Original Mrs. Dash (My choice of seasoning)
Cookie Sheet
Wax Paper
If you have not already done so rinse your asparagus and trim off the white ends. Lay freshly trimmed asparagus on lined cookie sheet.
Then lightly drizzle the asparagus with EVO (extra virgin oil). To make sure they were light coated I just slightly tossed them with my hand. Then I sprinkled salt and Original Mrs. Dash my choice of seasoning because I could not find my pepper.
Then I popped it in the oven for 8 to 10 minutes on 350. Most recipes I have seen say 400 for 8 minutes but I know how my oven is so that is why I choose 350 and it came out wonderful! I can see why entire households who like entire asparagus go nuts for these type recipe. Well here is my final result!
I could not help to sneak a piece before dinner and I was taken a back! Not only did I find it easier than steaming asparagus I found that it taste a lot better. Now I am the only in my household that really eats asparagus. My son is really discovering this vegetable and my husband prefers never to touch it but I made him try it and he liked it. He actually ate a few pieces for dinner and that is saying something for someone who does not touch asparagus. What I also love about this recipe is you can season it how you want! If you want spice add a little spice. I have also seen these recipes where people shake Parmesan cheese on them. I really do believe the choices are endless on this side dish and can be tailored to personal choice.
Well enjoy this simple, yummy, side dish!!!
Sunday, April 27, 2014
PANTY LINER USE 101: The Other Wonderful Uses of these products!
By the title of this post I am sure I have a couple of you thinking why is this woman talking about panty liners and how to use them? No this is not about health, puberty, or instructions that can be found on the package they come in. I have found neat, functional, emergency,and alternative uses for those little mini pads that I actually use on a daily/weekly basis!
For any woman or man who has purchased personal female care products likely have bought or have noticed the selection of panty liners. The first thing if you noticed they are range in price but are cheap. I personally purchase a lot of panty liners keep on hand and mostly not "ALL Personal Reasons". If you do the math from a personal stand point depending on what actual product you bought and you used one panty liner a day for whatever reason you could buy a year supply for around $15.00.

For any woman or man who has purchased personal female care products likely have bought or have noticed the selection of panty liners. The first thing if you noticed they are range in price but are cheap. I personally purchase a lot of panty liners keep on hand and mostly not "ALL Personal Reasons". If you do the math from a personal stand point depending on what actual product you bought and you used one panty liner a day for whatever reason you could buy a year supply for around $15.00.
Now this is a basic liner. I know they come in all shapes, sizes, scents, and colors but for this post and purpose I use the cheap basic ones. However, in a pinch and need of one part with more expensive panty liner and when it is over you will see why I keep the cheap ones on hand! Now obvious and will be stated to get out they way the number one use for panty liners the directions and the use can be found right on the package.
Here are my uses for using panty liners on a daily/weekly basis
1. Removing my nail polish. Now I am not taking credit for this idea but my sister-in-law gave me this idea. When I was at my parents my sister-in-law was in the process of painting her nails. She had everything but the material she was going to use with nail polish remover. Thought she was going to run to bathroom to grab a cotton balls or tp....she came back with a panty liner. She removed her nail polish with a panty liner. Well when I got home of course I had to try it! What I like about it is it does not fall apart, one does both hands and feet, and I usually get multiple uses from them! So instead of using cotton balls or rounds were I go through several I now keep a small package of panty liners with my nail stuff.
2.I do not what kind of shoes you wear that do not require socks but I wear tons of flats (thanks to be one inch short of being 6 foot) wedges and some times things with a little height if the mood hit me. Now I know they make no shoe socks and insoles which I both own but I have run into a couple of problems. I love the no show socks I buy mine at PayLess because I can find them in many colors such as black, white, brow, nude, green, and pink to fit my big size 11 gorgeous feet! However, if you wear these no show socks you realize they really are not "no show" socks and it really for me is not a problem when I am not wearing jeans but when I am dress or something where my shoe is being completely seen I do not want my socks to be shown it kind of one my pet peeves! Now I go without wearing socks and for a short time it is an okay solution but for having to in your shoes all day is a no go for me... foot sweat and stank! So I went looking for solutions I could by insoles and they have a wide variety of these as well. Well I ran into a couple of problems with these. I found a lot of them made my shoes to small and unlike tennis shoes you cannot remove the sole of these type shoes to replace with the other insoles. Well I started researching where else online when I am across a woman who used panty liners as shoe insoles. So I gave it a try! I took the panty liner took the strip off and stuck the adhesive side down into my shoe. After a trial and error of placement I found that my feet do not sweat and provide a little cushion in my flats. Now they lady trims the liner for her shoes because of her shoe size but because I have big feet I do not have to so I just grab a couple of liners out of my sock draw when I am wearing shoes that require assistant! You can also adjust the liner to other parts of your shoe it really is a trial and error process to see what works for you!
3. Dog's personal use. If you have had female dogs that are not fixed well they go through heat. They just go not through often as human women. Well I have a female Jack Russell Chloe and my husband kept going back and forth in we were going to breed her. In the mean time we had to deal with her in the heat moments! Well I bought her something called bitch pants... I know funny right? Well basically they are blue diaper with a hole for the dog tail with a white absorbent layer and come in multiple sizes. Now you can allow her to wear as is and then wash it but as most women know when "accidents" occur it very hard to completely removed if not taken care of right away. Well I looked at the dog care products and low and behold they make pads for dogs and they are expensive!!!!!!!!!! They are more expensive than my products and thin like paper. Well LIGHT BULB! Well just as a woman would use a panty liner I lined her bitch pants with the liner in the area where she needs, change them out when I walk her, and wash the bitch pants at the end of the day!
4. I cut myself in the truck. I was trying to open a package and sliced my finger on right on the finger. Well I was running out of the couple of napkins and my kids were crying and my husband was going into caring but not required panic mode. So I was looking around in my purse for something when I came across a panty liner and desperate times call for desperate measures! I opened it and placed it on my fingure and applied pressure calmed the kids down. Then when I realized the first aid kit was in the glove box the whole time! However, in a pinch the liner was clean a lot better then a somewhat clean napkin! So you know what I added to the first aid kit?That is right panty liners!
Now I am sure there are other uses for these panty liners besides the "conventional" use these are just some of they alternative uses I use panty liners for.
WARNING BE CAREFUL RESEARCHING PANTY LINERS ON THE INTERNET. I NOTICED NOT SOME NICE TITLES AND IN THE IMAGE SECTION HAD SOME PICTURES THAT I THOUGHT WERE NOT RELATED BUT WERE XXX RATED AND OTHERS WERE GROSS
Thursday, January 23, 2014
A Bipolar Mom and Her Daily Life! : DIY: Carpet Cleaner Powder
A Bipolar Mom and Her Daily Life! : DIY: Carpet Cleaner Powder: So have you guys made your own laundry soap? Well I am a big fan of that but one problem is always have borax left over and when not sealed ...
Wednesday, January 22, 2014
DIY: Carpet Cleaner Powder
So have you guys made your own laundry soap? Well I am a big fan of that but one problem is always have borax left over and when not sealed properly it hardens. So I started researching what can you do with borax besides what else is on the box? Well I found a great recipe for DIY Carpet cleaner powder and I tested it out myself and I am sold! I am horrible about doing before and after pictures. Here is my recipe and it will call for some unlikely items but trust me and keep reading!
DIY CARPET CLEANING POWDER
Borax (I use what is left from making my own laundry soap)
2 Boxes of Baking Soda (standard size)
Cornmeal (optional but strongly suggested)
Cinnamon (optional)
Container with lid large enough for mixture
Scoop/Measuring Cup
Before I begin this recipe as I stated calls for unlikely items but please bare with me and I will explain. This recipe is easy-peasy. All you do is mix your Borax Powder and Baking Soda Powder in the container and make sure the mixture is well mixed. Now you can stop there and use this on your carpets by sprinkling it on there, letting it sit, then vacuum. You should have plenty of mixture for multiple cleanings.

However, the recipe I use calls for cornmeal. Now why cornmeal? I asked the same questions and was very skeptical of its purpose on my carpets. So here is my best way to explain why there is cornmeal used in the DIY Carpet Cleaning Powder. If you put a little bit in your hands you can feel how rough/abrasive it is. Well when it is put in the cleaning powder mixture it requires your vacuum to work at getting up and I guess what you would call fluffing the nap of the carpet. It also causes us to go slower when we are vacuuming and making sure we get all the powder mixture up (which I am guilty of). If you do not believe me try it out yourself in a small area. If you decide to use cornmeal in your recipe the question is often how much do you use? Well that is just really personal taste really. I add just enough to really tell/feel the abrasiveness of the powder.
The Cinnamon is just simple I just sprinkled it in there for smell. There are all sorts of fragrances you can add to the mixture but once again that is for personal taste.
How long to leave the carpet cleaning powder on? one of the reasons I used this powder was to drastically freshen my home. One of my dogs was sick and had a very much "sick dog smell" . It was horrible and no matter what I did I could still smell it. Well we were going to visit family and I decided to sprinkle this on the carpet and leave it until we got back. So it stayed on my carpet for a week. It really worked and my carpets looked great and my house smelled back to normal. Well I know a week is not an ideal time. So I have tested out a couple of times. If your entire house leaves for the day you can sprinkle the powder on the carpet and then vacuum when you return. I did find it when I was cleaning you can leave it on your carpets for about 30 minutes and get the desired results.
HAPPY CLEANING!
WARNING: I AM ONE PERSON AND HAVE ONLY TESTED THIS OUT ON MY CARPETS. I HAVE GIVEN THIS RECIPE TO OTHERS BUT HAVE EXPLAINED THEY SHOULD TEST THIS RECIPE OUT ON THEIR OWN CARPETS BEFORE USING!
Saturday, August 24, 2013
A Bipolar Mom and Daily Life! : DIY TUTU DRAPES and TULLE DRAPES
A Bipolar Mom and Daily Life! : DIY TUTU DRAPES and TULLE DRAPES: Let me first say that I am sorry that I have not been on for a while. The last part of my pregnancy was interesting to say the least. Well t...
DIY TUTU DRAPES and TULLE DRAPES
Let me first say that I am sorry that I have not been on for a while. The last part of my pregnancy was interesting to say the least. Well that part is over and I am now a proud parent of a beautiful little girl! With that being said it leads me into my next post about drapes.
When I was re-doing the nursery from the little boys nursery to a little girls nursery the room took on a princess theme. I re-did an old dresser and night stand of mine in pink as well as change out the bedding. However, because I live in military housing I could not paint the walls. Actually, I take that back I can paint the walls but you have to either paint them back to white or pay a fee when you move out and it just something I am really not into so I wanted to make a small statement with the window treatments. In the nursery there are two very different shaped windows that would make it hard for me at least to decide on what style from a store that I would settle on. So I went to the infamous http://pinterest.com/ website and started looking up possible ideas for the window treatments for the nursery when I came across no-sew tulle drapes! There were a couple of pages that led to me to places where I could pay for custom made tulle drapes but not this MOMMY!!! If there is a will there is way!
The next will be the directions on how I made my no-sew tulle window treatments

This is the first window treatment I did. I bought all tulle at www.fabric.com which for me has a great selection of tulle. This tulle would be considered being bought off the bolt. Meaning if you went into a fabric store or fabric section your would see them on bolts with the other fabrics. As you can see the colors I selected. I do suggest if you are not familiar with fabric.com or other online fabric stores that you actually go to a fabric store to see the tulle in person because buying online the colors may appear different on screen then what you are actually looking for. For this size window each panel is 4 1/2 yards. When I bought the tulle I bought it in 9 yard sections at (.99 cent a yard) so basically my mother an I cut each piece in half. I then took each panel and tied it directly to the drape rod. I experimented with multiple style knots but I settled on a simple slip knot (here is a link if you are not familiar with the knot http://www.ehow.com/video_4971036_tie-slipknot.html) . I will note on each piece one end is smaller than the other I made sure all my shorter pieces were in the back. I personally like the space between them but you can add more tulle or spread them out more it really is up to you. What I really like about these besides being inexpensive is how easy it will be easy to change them out so as her taste change so can the tulle (if that is what she is wanting).


The second window treatment I did I found on pinterest.com it was called a tutu valance and as you can see it looks like one big fluffy tutu. For this instead of buying the tulle on the bolts I bought the tulle on spools. You can find them most anywhere but I also bought mine at fabric.com because they had the exact same colors on the bolt as they did on spools so my colors match on both window treatments.I have included a picture of tulle on a spool for those who may not know what I am talking about. I also suggest that you make sure that you buy enough tulle for each project. This one I bought two spools of each color. They cost about $2.98 for each spool for the type I bought at fabric.com. This one consist of 5 colors so this did make this window treatment more expensive then the other but still more affordable than custom made drapes and much cuter than anything I saw in stores. The first two things you will have to decide on is what pattern of colors you would want and how long you would want each piece. Each piece I cut with the pinking sheers were about 4-5 inches. I then you used a simple slip knot (http://www.ehow.com/video_4971036_tie-slipknot.html) and tied each piece to the drape rod. I cannot tell you how pieces I tied to the rod but I can tell you that I used all my tulle and packed it all together for a really full look. Again play with look and see what you come up with! I had a lot of fun making these drapes. I will be still be adding something to these probably a sheer underneath these.
When I was re-doing the nursery from the little boys nursery to a little girls nursery the room took on a princess theme. I re-did an old dresser and night stand of mine in pink as well as change out the bedding. However, because I live in military housing I could not paint the walls. Actually, I take that back I can paint the walls but you have to either paint them back to white or pay a fee when you move out and it just something I am really not into so I wanted to make a small statement with the window treatments. In the nursery there are two very different shaped windows that would make it hard for me at least to decide on what style from a store that I would settle on. So I went to the infamous http://pinterest.com/ website and started looking up possible ideas for the window treatments for the nursery when I came across no-sew tulle drapes! There were a couple of pages that led to me to places where I could pay for custom made tulle drapes but not this MOMMY!!! If there is a will there is way!
The next will be the directions on how I made my no-sew tulle window treatments
Supplies You Will Need
Tulle (size, color(s), and amount will determine how long and how thick you want the look. I used both bolts (yardage) and spools)
Scissors or Pinking Sheers
Helping Hand (Optional- I was very pregnant making these so I had my mom help me)

This is the first window treatment I did. I bought all tulle at www.fabric.com which for me has a great selection of tulle. This tulle would be considered being bought off the bolt. Meaning if you went into a fabric store or fabric section your would see them on bolts with the other fabrics. As you can see the colors I selected. I do suggest if you are not familiar with fabric.com or other online fabric stores that you actually go to a fabric store to see the tulle in person because buying online the colors may appear different on screen then what you are actually looking for. For this size window each panel is 4 1/2 yards. When I bought the tulle I bought it in 9 yard sections at (.99 cent a yard) so basically my mother an I cut each piece in half. I then took each panel and tied it directly to the drape rod. I experimented with multiple style knots but I settled on a simple slip knot (here is a link if you are not familiar with the knot http://www.ehow.com/video_4971036_tie-slipknot.html) . I will note on each piece one end is smaller than the other I made sure all my shorter pieces were in the back. I personally like the space between them but you can add more tulle or spread them out more it really is up to you. What I really like about these besides being inexpensive is how easy it will be easy to change them out so as her taste change so can the tulle (if that is what she is wanting).


The second window treatment I did I found on pinterest.com it was called a tutu valance and as you can see it looks like one big fluffy tutu. For this instead of buying the tulle on the bolts I bought the tulle on spools. You can find them most anywhere but I also bought mine at fabric.com because they had the exact same colors on the bolt as they did on spools so my colors match on both window treatments.I have included a picture of tulle on a spool for those who may not know what I am talking about. I also suggest that you make sure that you buy enough tulle for each project. This one I bought two spools of each color. They cost about $2.98 for each spool for the type I bought at fabric.com. This one consist of 5 colors so this did make this window treatment more expensive then the other but still more affordable than custom made drapes and much cuter than anything I saw in stores. The first two things you will have to decide on is what pattern of colors you would want and how long you would want each piece. Each piece I cut with the pinking sheers were about 4-5 inches. I then you used a simple slip knot (http://www.ehow.com/video_4971036_tie-slipknot.html) and tied each piece to the drape rod. I cannot tell you how pieces I tied to the rod but I can tell you that I used all my tulle and packed it all together for a really full look. Again play with look and see what you come up with! I had a lot of fun making these drapes. I will be still be adding something to these probably a sheer underneath these.
 |
| This is tulle on a spool most often you can find it as 6" x 25 yards |
Friday, May 17, 2013
A Bipolar Mom and Daily Life! : DIY Bath Paints
A Bipolar Mom and Daily Life! : DIY Bath Paints: I know I have not written in a bit. I was waiting for my new anti-virus program. Anyways onto my post. Are you addicted to Pinterest an ac...
A Bipolar Mom and Daily Life! : DIY Bath Paints
A Bipolar Mom and Daily Life! : DIY Bath Paints: I know I have not written in a bit. I was waiting for my new anti-virus program. Anyways onto my post. Are you addicted to Pinterest an ac...
DIY Bath Paints
I know I have not written in a bit. I was waiting for my new anti-virus program. Anyways onto my post.
Are you addicted to Pinterest an actually do some of the things you see on it? Well I fell in love with DIY Bath Paints! This idea is so simple and cheap that will make bath time for your little one so much fun!
Here is what you will need for DIY Bath Paints

Shaving Cream Foam (I bought mine at the dollar store and I bought the sensitive kind).
Container or something for the bath paints (I found these little containers also at the dollar store but I have seen people use paper plates, muffin tins, and so on)
Food Coloring
Paint Brush (Optional)
Alter the recipe any way that you need
I fill up the small container with shaving foam and then add 1-2 drops of food coloring (I strongly recommend no more then that). I then mix it with a chopstick since my son does not use the paint brush yet.
Now my biggest concern was that I was going to stain the tub because it will change the water colors. However, the first time I made them I decided to make all 4 basic colors to test them out. Besides changing the water colors there were no stains no nothing. I was really concerned about the red (I just gave the tub an extra rinse after bath time). Also the first time I made them my son was a little hesitant of what he was suppose to do with them but now I make just two colors at a time (will likely increase when he gets older) and he has a great time painting the bath tub!
Cost to Make Bath Paints
This cost less then a dollar to make (probably less then $.25 per batch). I have seen bath foam retail for about $4.00!!! So this is a great cheap fun thing to do!
Are you addicted to Pinterest an actually do some of the things you see on it? Well I fell in love with DIY Bath Paints! This idea is so simple and cheap that will make bath time for your little one so much fun!
Here is what you will need for DIY Bath Paints

These are first bath paints I made
Shaving Cream Foam (I bought mine at the dollar store and I bought the sensitive kind).
Container or something for the bath paints (I found these little containers also at the dollar store but I have seen people use paper plates, muffin tins, and so on)
Food Coloring
Paint Brush (Optional)
Alter the recipe any way that you need
I fill up the small container with shaving foam and then add 1-2 drops of food coloring (I strongly recommend no more then that). I then mix it with a chopstick since my son does not use the paint brush yet.
Now my biggest concern was that I was going to stain the tub because it will change the water colors. However, the first time I made them I decided to make all 4 basic colors to test them out. Besides changing the water colors there were no stains no nothing. I was really concerned about the red (I just gave the tub an extra rinse after bath time). Also the first time I made them my son was a little hesitant of what he was suppose to do with them but now I make just two colors at a time (will likely increase when he gets older) and he has a great time painting the bath tub!
Cost to Make Bath Paints
This cost less then a dollar to make (probably less then $.25 per batch). I have seen bath foam retail for about $4.00!!! So this is a great cheap fun thing to do!
Sunday, April 14, 2013
A Bipolar Mom and Daily Life! : DIY Laundry Soap
A Bipolar Mom and Daily Life! : DIY Laundry Soap: Now I thought I was never going to be a person making my own laundry soap just to save a few bucks over the year. However, this is a product...
DIY Laundry Soap
Now I thought I was never going to be a person making my own laundry soap just to save a few bucks over the year. However, this is a product that I stand by and it will last you forever!
There are numerous recipes that you can find online on how to make laundry soap and the basically consist of the same components- Borax, Washing Powder, and a bar laundry soap. I know of a ton of people that make it so it really not a new idea but I will put in my tips that I used to make my laundry soap.
Here is what you will need to make your own laundry soap (the powder version)
1-cup of Borax (One of the most popular brands is 20 Mule Team)
1- cup of Washing Powder (I bought Arm & Hammer)
2-cups of a bar laundry soap (I use Zote and Fels Naptha Soap)
You can find this all in the laundry section at Walmart and I am sure other supermarkets (if not you can buy it online).
If this is your first time making laundry soap here is what you will also need
A container with a lid (I found mine at Walmart it holds 3-4 batches of powder laundry soap)
A cutting board and knife (you can buy it new but I just used an old set that will be used for this purpose- I do this instead of grate the soap!)
A Blender or Grater- (I used the blender over the grater and the powder comes out super fine instead of chunky)
Measuring cups
Large Bowl
1 Tablespoon (this can be an old one or new- it is for the finished product)
The first thing I do is chop the bar laundry soap into little cubes. The soap is soft and easy to cut!
*Now I have done Zote (I have seen it in white bars and pink bars it does not matter which one) by itself and Fels Naptha Soap (it is a yellow type soap bar) by itself (you can use one or the other) but I used a combination of both. I just think it personally works better but I also have hard water! However, experiment with what you like (I mean that is the reason there are so many laundry soaps out now)! I have come across some soap recipes that use Ivory, Sunlight, and Kirk’s Hardwater Castile. The key here is not to use heavily perfumed soaps. You house will smell great while making it!
The second thing I did was pour a small amount of the powder into a blender first (the borax and washing powder)
*The reason I put the powder in first is it helps break up the bar soap. I do small amounts at a time to make sure I really get it mixed up. I also will put the mixed up product in a large bowl so that I can re-mix it a final time. However, experiment with your method! I just do what is easier for me!
The third thing I did was put in a good handful of the chopped up bar soap in the blender and then blend
*The blender for me got the powder chopped up fine vs. hand grating it and for it me it saved time!
The 4th thing I did was put in the container I bought with the 1 Tablespoon (it is 1-2 Tablespoons of the laundry powder per load).
* I bought a plastic type container at Walmart. I found it where they sell the canisters for the kitchen. The container I bought is large enough to hold 3 to 4 batches of the laundry powder (which is normally what I make at one time).
I strongly suggest that you experiment with the recipe and use what you like as well as the method you prefer to make it! You can also make into a liquid/gel form if you like. I have tried both and I love the powder version. Let me know how you did and what tips you have to share!
Here are a couple of websites that have laundry soap recipes!
http://tipnut.com/10-homemade-laundry-soap-detergent-recipes/
http://www.ehow.com/way_5477229_homemade-laundry-detergents.html
Subscribe to:
Posts (Atom)